Imagine a dessert that feels utterly luxurious and indulgent, yet requires minimal fuss to create. A treat that satisfies your deepest cravings for rich, creamy sweetness paired with that iconic chocolatey crunch. Welcome to the world of easy Oreo cheesecake, a dream come true for dessert lovers and busy bakers alike! This isn't one of those intimidating, sky-high cheesecakes that demands a professional pastry chef's touch. Instead, it's a wonderfully approachable oreo cheesecake recipe designed for home cooks who want maximum flavor with minimum stress – especially because it skips the dreaded water bath!
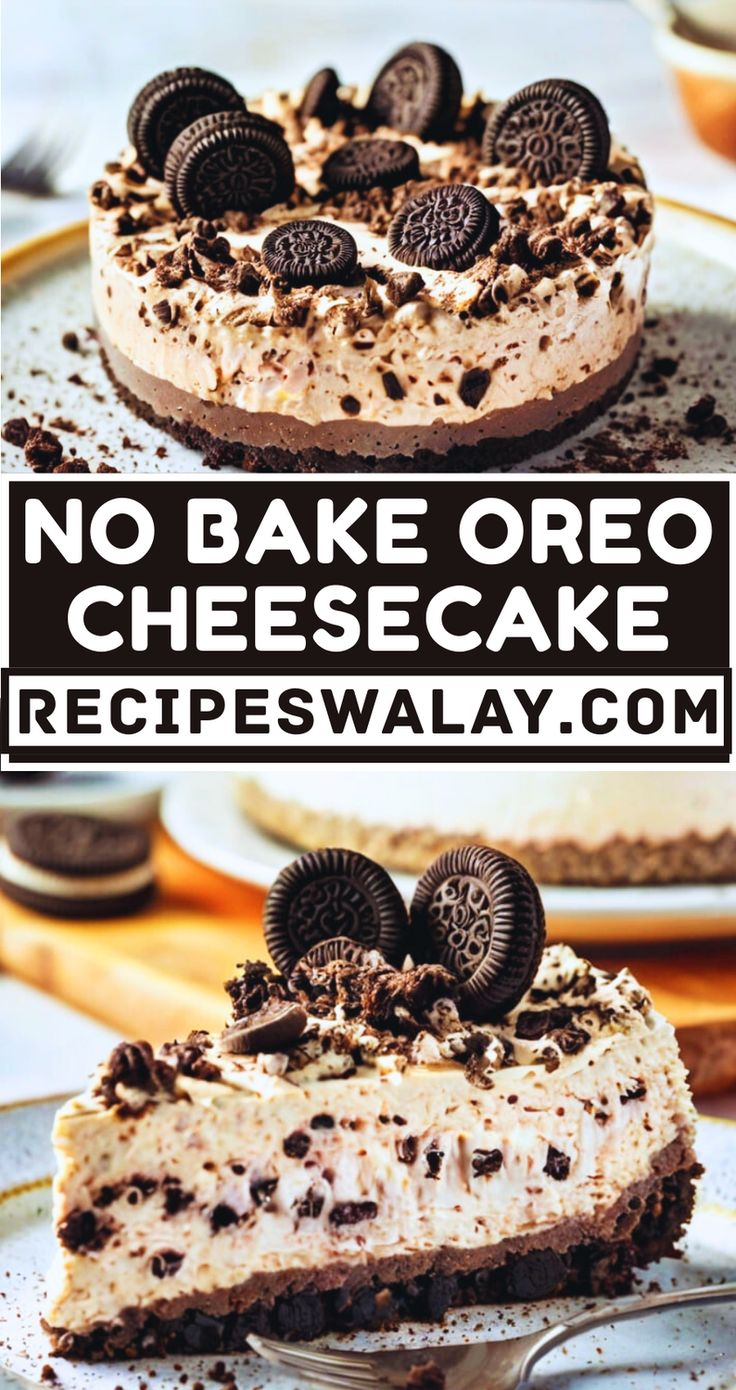
This particular oreo cheesecake recipe is quickly becoming a household favorite. It boasts a perfectly balanced profile: a sturdy, buttery crust made from crushed Oreo cookies, a velvety smooth cream cheese filling that's just the right thickness, and a generous sprinkling of extra Oreo crumbs on top for that irresistible finish. It’s a delightful indulgence for any occasion, from a casual weeknight treat to a celebratory dessert. If you're an Oreo enthusiast, prepare to fall in love.
Why This Easy Oreo Cheesecake Recipe is Your New Obsession
There are countless reasons to adore this particular oreo cheesecake recipe. Beyond its undeniable deliciousness, it’s specifically crafted to be as straightforward as possible, ensuring a delightful baking experience and an even more delightful eating experience.
No Water Bath, No Worries!
Perhaps the most compelling feature of this recipe is that it brilliantly bypasses the need for a water bath. For many, the thought of wrestling a springform pan wrapped in foil into a large pan of hot water is enough to deter them from making cheesecake altogether. A water bath is traditionally used to create a moist, even baking environment, preventing cracks and ensuring a creamy texture. However, with the right combination of ingredients and careful baking techniques – including the strategic use of cornstarch as a stabilizer – this recipe achieves that same coveted creamy perfection without the extra step. This means less cleanup, less stress, and more time to enjoy your masterpiece!
Effortless Elegance
This isn't a towering, multi-layered confection, but rather a beautifully balanced, manageable size that feels special without being overwhelming. It’s perfect for serving at gatherings or simply enjoying a slice (or two!) yourself. The simplicity of its preparation belies the sophisticated taste it delivers.
A Symphony of Textures and Flavors
- The Crust: It starts with a simple yet sublime two-ingredient crust of crushed Oreo cookies and melted butter. This creates a rich, chocolatey foundation with just the right amount of crunch, providing a delightful contrast to the smooth filling.
- The Filling: The star of the show, a sweet, custardy cream cheese filling that's rich and velvety. It's thick enough to be satisfying but not so dense that it feels heavy.
- The Topping: A final flourish of crushed Oreos crowns the cheesecake, adding an extra layer of chocolatey goodness and textural intrigue. Each bite promises that iconic cookies-and-cream experience.
Minimal Ingredients, Maximum Impact
You'll be pleased to find that the ingredient list is short and sweet, featuring items readily available at any local grocery store. This further contributes to the "easy" factor, making it accessible for even the most impromptu baking sessions.
Unveiling the Stars of Your Oreo Cheesecake Recipe: Key Ingredients
While the process is simple, the quality of your ingredients plays a significant role in achieving that perfect creamy texture and rich flavor. Here’s a closer look at what you’ll need to create the best oreo cheesecake recipe:
- Oreo Cookies: The heart and soul of this dessert! Classic Oreos are always a fantastic choice, providing that familiar, comforting chocolate and cream flavor for both the crust and the topping. Don't be afraid to experiment, though! Peanut butter, mint, or even golden vanilla Oreos can offer a fun twist to your cheesecake's flavor profile. Remember, you'll need enough for the crust, a generous portion mixed into the filling, and extra for the top!
- Salted Butter: I often reach for salted butter in my baking as it subtly enhances the overall flavor balance. However, if you only have unsalted on hand, simply add a tiny pinch of salt to your crust mixture. The melted butter binds the cookie crumbs into a firm, delicious crust.
- Full-Fat Cream Cheese: This is a non-negotiable for a truly decadent cheesecake. Full-fat cream cheese provides the necessary richness, body, and creamy texture that defines a great cheesecake. While low-fat cream cheese is an option, it will yield a less rich and potentially more watery result. Avoid non-fat cream cheese entirely for cheesecake; it simply doesn't set or taste right. Crucial Tip: Ensure your cream cheese is softened to room temperature before mixing. This prevents lumps and ensures a smooth, uniform batter.
- Granulated Sugar: For that perfect touch of sweetness, balancing the tang of the cream cheese and the richness of the chocolate.
- Large Eggs: Eggs act as a binder, giving the cheesecake its structure and contributing to its custard-like texture. Important: Bring your eggs to room temperature as well. Cold eggs can curdle the batter and affect the final texture.
- Vanilla Extract: A splash of good quality vanilla extract enhances all the other flavors, adding a warm, aromatic depth to the cheesecake.
- Cornstarch: This is a secret weapon in no-water-bath cheesecakes! Cornstarch acts as a stabilizer, helping the cheesecake set beautifully without cracking, and contributes to that silky-smooth texture we're aiming for.
- Full-Fat Sour Cream: Just like with the cream cheese, full-fat sour cream is highly recommended here. It adds a lovely tang that cuts through the sweetness, a boost of moisture, and an extra layer of creaminess to the filling. Another key tip: Make sure your sour cream is also at room temperature.
Mastering the Art of Easy Oreo Cheesecake: Step-by-Step Guide
Making this incredible oreo cheesecake recipe is simpler than you might think. With just a few key steps and a little patience, you'll have a show-stopping dessert ready to impress.
Pro Tip: Before you even start, gather all your ingredients and bring them to room temperature. This is fundamental for achieving a perfectly smooth, lump-free batter and the silkiest texture imaginable.
Crafting the Perfect Oreo Crust
- Crush Your Oreos: In a food processor, pulse about 20-25 classic Oreo cookies until finely crushed into crumbs. If you don't have a food processor, place them in a sealed plastic bag and crush them with a rolling pin.
- Mix with Butter: Melt about 1/4 cup of salted butter. Combine the Oreo crumbs with the melted butter in a bowl, mixing until the crumbs are evenly moistened and resemble wet sand.
- Press into Pan: Firmly press the mixture into the bottom of a 9-inch springform pan. A flat-bottomed glass or the back of a spoon works wonders for an even, compact crust.
- Pre-bake and Cool: Bake the crust for approximately 6-8 minutes at 350°F (175°C). This brief pre-bake helps set the crust and makes it extra crisp. Remove from the oven and let it cool completely on a wire rack while you prepare the filling.
Whipping Up the Velvety Cheesecake Filling
- Cream the Cheese and Sugar: In a large bowl, using an electric mixer, beat the softened full-fat cream cheese and granulated sugar together until the mixture is light, fluffy, and completely smooth. Scrape down the sides of the bowl frequently.
- Add Eggs, Vanilla, and Cornstarch: Beat in the room temperature large eggs one at a time, mixing just until combined after each addition. Be careful not to overmix at this stage, as incorporating too much air can lead to cracks later. Stir in the vanilla extract and cornstarch until fully incorporated.
- Fold in Sour Cream: Gently fold in the room temperature full-fat sour cream until just combined. Again, avoid overmixing.
- Pour and Top: Evenly spread the cheesecake batter over your cooled Oreo crust. For an extra dose of cookie goodness, sprinkle about 1/2 cup of additional crushed Oreo crumbs evenly over the top of the batter before baking.
The Bake and Chill for Creamy Perfection
- Bake: Place the springform pan on a baking sheet (to catch any potential drips, although with a good springform, this is rare). Bake in a preheated oven at 325°F (160°C) for about 50-60 minutes, or until the edges are set and lightly golden, but the center still has a slight wobble when gently shaken.
- Cool Gradually: This step is critical for preventing cracks! Once baked, turn off the oven and prop the oven door open slightly with a wooden spoon. Let the cheesecake cool slowly in the oven for about an hour. This gradual cooling prevents drastic temperature changes that can cause cracking.
- Final Cooling and Chill: Remove the cheesecake from the oven and let it cool completely on a wire rack at room temperature. Once fully cooled, cover the cheesecake with plastic wrap and refrigerate for a minimum of 6 hours, or ideally, overnight. This chilling time is essential for the cheesecake to firm up and for the flavors to fully meld.
- Serve and Enjoy: Once thoroughly chilled, carefully run a thin knife around the edge of the pan before releasing the springform sides. Decorate with extra whipped cream, chocolate ganache, or more crushed Oreos just before serving for that ultimate cookies and cream experience!
For even more decadent options, explore our Ultimate Oreo Cheesecake: Rich, Creamy & Cookie-Loaded guide, offering fantastic ideas for elevating your dessert even further. Or, if you're looking for a slightly different take on the preparation, check out Whip Up the Best Oreo Cheesecake: Simple Steps to Decadent Dessert.
Expert Tips for Your Best Oreo Cheesecake Recipe
Achieving cheesecake perfection is easier than you think, especially with this easy oreo cheesecake recipe. Here are a few extra tips to ensure your dessert turns out flawless every time:
- Room Temperature is Key (Revisited!): We can't stress this enough! Softened cream cheese, room temperature eggs, and sour cream emulsify much better, creating a smooth, lump-free batter. This leads to a truly creamy and uniform cheesecake texture. Plan ahead and take these ingredients out of the fridge at least an hour before you start.
- Don't Overmix the Batter: Once you add the eggs, mix only until just combined. Overmixing incorporates too much air into the batter, which can cause the cheesecake to puff up too much during baking and then crack as it cools.
- Use a Springform Pan: A springform pan is designed with removable sides, making it incredibly easy to release your cheesecake without damaging its delicate structure. A 9-inch pan is ideal for this recipe.
- Patience with the Cooling and Chilling: The cooling process is just as important as the baking! Resist the urge to rush it. Gradual cooling in the oven helps prevent cracks, and the minimum 6-hour chill time allows the cheesecake to set properly, firm up, and develop its full flavor. A well-chilled cheesecake is also much easier to slice cleanly.
- Customization is Fun: While classic Oreos are fantastic, feel free to experiment with different Oreo flavors for your crust, filling, or topping. You can also drizzle chocolate ganache or add a layer of homemade whipped cream before serving for extra flair.
- Storage: Store leftover cheesecake covered tightly with plastic wrap in the refrigerator for up to 3-4 days.
Indulge in Creamy, No-Fuss Perfection
This easy oreo cheesecake recipe is a testament to the fact that you don't need complicated techniques or a culinary degree to create an absolutely sensational dessert. With its rich, buttery Oreo crust, luxuriously creamy filling, and delightful cookie crumble topping, it delivers all the indulgence you crave without the stress of a water bath. It’s the perfect balance of special occasion elegance and effortless simplicity. So go ahead, gather your ingredients, and prepare to whip up a batch of creamy perfection that will undoubtedly become a treasured addition to your recipe collection. Your taste buds will thank you!
